Introduction
Recently, I was working on a IoT web application in Microsoft Azure and had the following architecture in mind: An IoT Central instance receives sensor data via MQTT but instead of using Power Platform or the build-in dashboards as a frontend, I wanted to integrate an Azure Web App Service. Furthermore, IoT Centrals multi tenant feature “Organizations” was important to me. Unfortunately, my Web App ran into a few authentication issues. This article describes my journey.
Setup
First, I created two azure components:
- IoT Central using this setup guide. It explains how to create an IoT Central instance and connect a simulation device with bidirectional access. Great for playing around. 🙂
- A web application written in NodeJS which reads and displays IoT Central sensor data using its REST API. You can find a basic setup tutorial here.
IoT Central provides either API token or AAD bearer token as authentication mechanisms. I started using an API token in my web application:
//dont do this at home and instead put it into a vault ;)
var apiToken = 'SharedAccessSignature sr=<secret>&skn=admin-token&se=1719237595466';

axios.defaults.headers.common['Authorization'] = `Bearer ${apiToken}`;
axios.post(/* url here */)
.then(res => {
      //...
});
The token works great for machine to machine communication but it is problematic in a multi-tenant environment because every user of the web application can see and operate every device. Instead, I had something like this in mind:
- A user of the web application performs a login with his Microsoft credentials
- After being authenticated, the client gets a personal access token (instead of the generic api token) and the user can only operate on devices which are part of his organization.
It took me some time to figure out how this can be achieved and the results are presented in the following sections.
Using an Access Token
Microsoft provides a great tutorial on how to write a NodeJS application which authenticates against the azure identity provider. First, an App Registration is created. It will give you a secret used by your web application to authenticate. Afterwards, a few code snippets are added to the project which provide two functions:
- login() with your Microsoft credentials.
- acquireToken() adds a bearer token to your session to access the corresponding azure resources (like IoT Central).
My problem was: You have to provide a scope. The example above does it in the following way:
router.get('/acquireToken', authProvider.acquireToken({
    scopes: ['User.Read'],
    redirectUri: REDIRECT_URI,
    successRedirect: '/'
}));
So all you have to do is changing “User.Read” to an IoT Central scope. All we have to do is figuring out the right scope string syntax.
Selecting the correct Scope
First I was looking in the API permissions of my app registration:
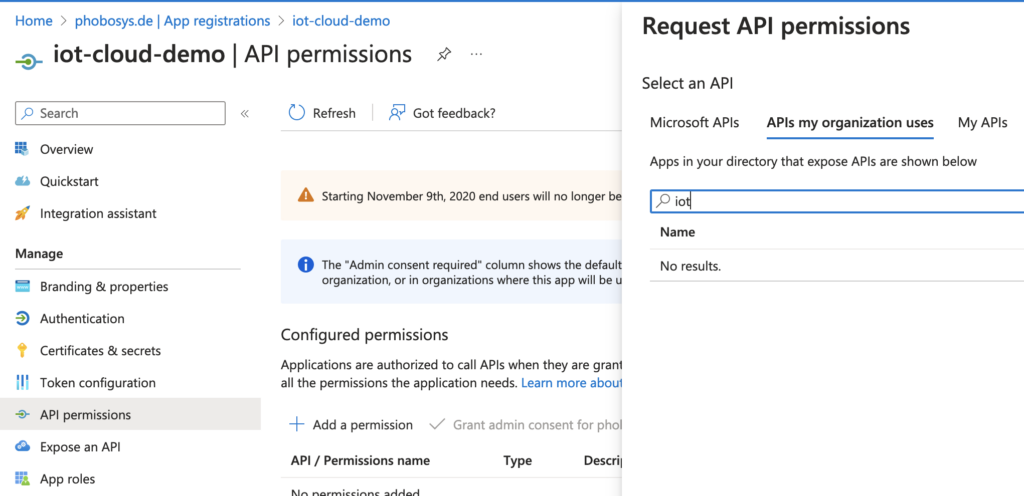
As you can see, the search results are empty. This was quite strange because there has to be an IoT Central API. I was about to give up but found this guide. It invokes the azure cli to create an app registration which uses the IoT Central APIs. So they definitely exist ;). The solution was: The search bar is quite poor and looks for exactly the string you have entered. This means, “Microsoft IoT” does the trick and lets you select the IoT Central APIs.
My next problem: How can this be converted into a scope string in my NodeJS application. This article lists a few examples:
- Read a user’s calendar: User.Read
- User.Read.All
- Microsoft 365 Mail API:
https://outlook.office.com - …
In general, the syntax is: <resource url>/<permission>. The only exception is Microsoft Graph. If the resource identifier is omitted in the scope parameter, the resource is assumed to be Microsoft Graph. For example, scope=User.Read is equivalent to https://graph.microsoft.com/User.Read.
This article provides more details. It is also possible to use the application ID like “api://11111111-1111-1111-1111-111111111111/api.read”. Furthermore, it mentions a few edge cases: “Certain web APIs such as the Azure Resource Manager API (https://management.core.windows.net/) expect a trailing forward slash (/) in the audience claim of the access token. In this case, pass the scope as https://management.core.windows.net//user_impersonation, including the double forward slash (//).”
After gathering this information, I went back to my app registration and its API permission section:
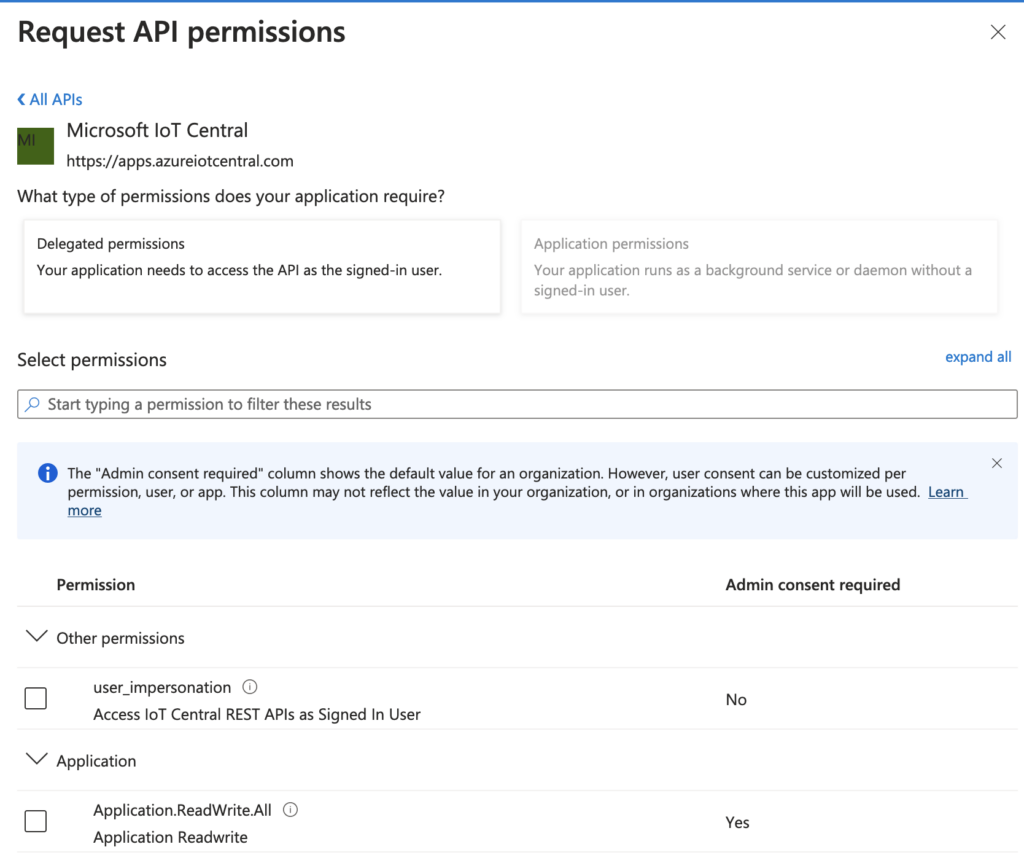
The resource URL “https://apps.azureiotcentral.com” can be found at the top of the page. At the bottom, we see the permissions. In my case, I needed “user_impersonation” because I wanted to access IoT central as a signed in user. This leads to the NodeJS scope string “https://apps.azureiotcentral.com/user_impersonation”. 🙂